Daily Schedules
Last updated April 10, 2025
How to enter Schedules
There are multiple ways to enter the schedule. From quick adds to templates, scroll through below to see which options is best suited for your needs.

Adding a single event:
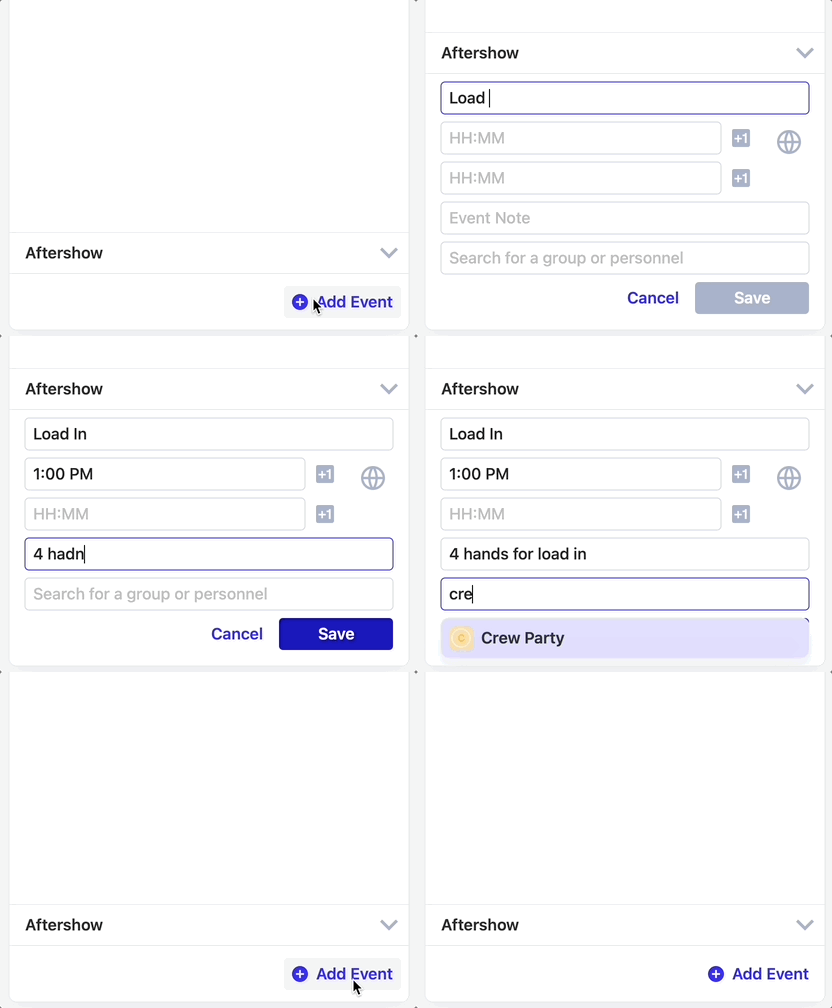
At the bottom of the schedule, you can click “Add Event” to add an event to the schedule. The following fields will appear:
- Event Name
- Start Time & End Times
- hint: use the +1 button for events that happen after midnight*
- Event Notes
- Association
- Search for personnel or groups to associate with the event if you’re using visibility .
Building a schedule for the day:
Click “Edit” at the top of the schedule to edit multiple events at once. A new window will appear, allowing you to tab through creating as many events as you have on the day. The schedule will automatically sort based on the start times of the events.
Creating Templates:
You can save templates if you have a similar schedule you want to apply to multiple days. Once you’ve created a schedule you like, from the edit view; select “Save as Template” in the lower right. Give the template a name and click save.
To apply the schedule to any given day, click Edit to go into the full edit view. Select the tab that says “Templates” in the top right, and choose the template to apply. Before it’s applied to the day, you can make any changes to the schedule. Then click save to apply the events to that day.
That’s it!
FAQs
- How do i make an event after midnight show at the bottom of the schedule? In the start and end time entry fields, you should see a +1 button. Select that whenever an event happens after midnight to force it to the bottom of the schedule.
- What is the association field? Association allows you to tag certain individuals and groups to scheduled events. If you’re tour is setup to use visibility, tagging a specific group on an event, will only allow that group to see that event. Checkout our tutorial on visibility to learn more!


