Creating a Request:
Once you’ve selected the show you want to add a request for, click the
From the pop up form, enter your guest’s information including any pass types necessary and hit save.
Once you’ve selected the show you want to add a request for, click the
Guest List tab. From here, click click the centered blue “Add Request” button.From the pop up form, enter your guest’s information including any pass types necessary and hit save.

Managing the Guest List
For admins, the guest list tab will show summary of the total tickets requested, approved, and remaining. By clicking anywhere on the summary, it will bring you to the full guest list.
For admins, the guest list tab will show summary of the total tickets requested, approved, and remaining. By clicking anywhere on the summary, it will bring you to the full guest list.

This full list will show the names of each request, the requestor, and the status of the request.
To filter down to specific statuses of requests, you can click on the
To filter down to specific statuses of requests, you can click on the
Pending, Approved, or Rejected tabs.
To approve or reject a request, click on the three dots to the right of the request and make your selection.
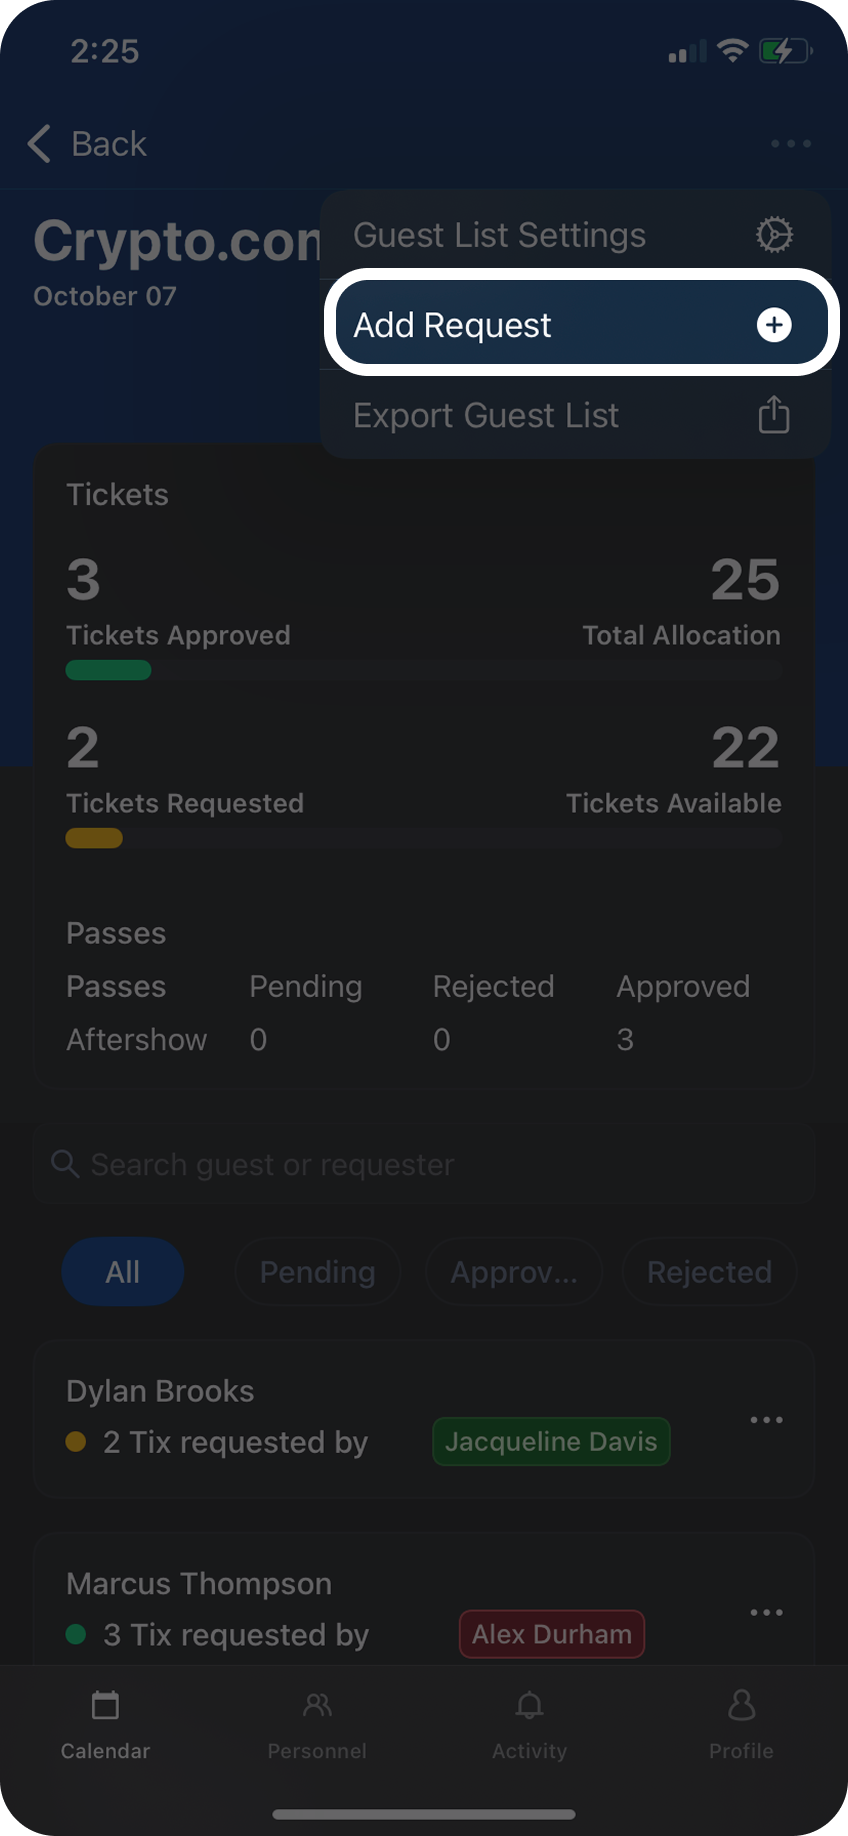
To add a new request, click on the three dots at the top right corner and choose
To add a new request, click on the three dots at the top right corner and choose
Add Request.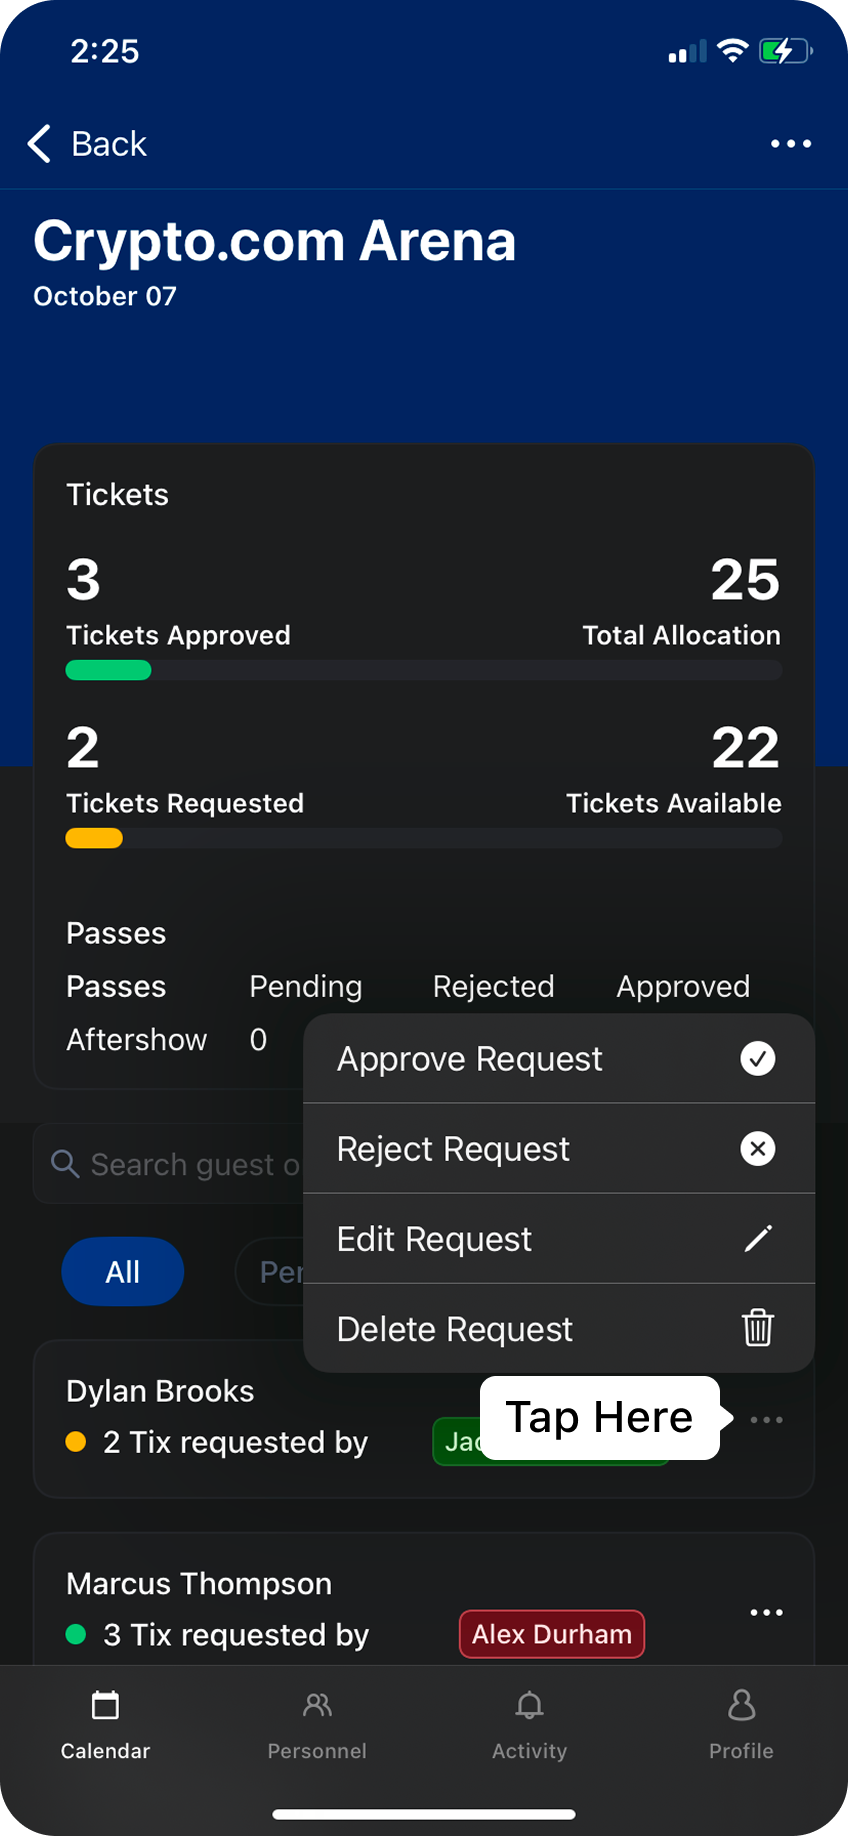
Limits & Restrictions
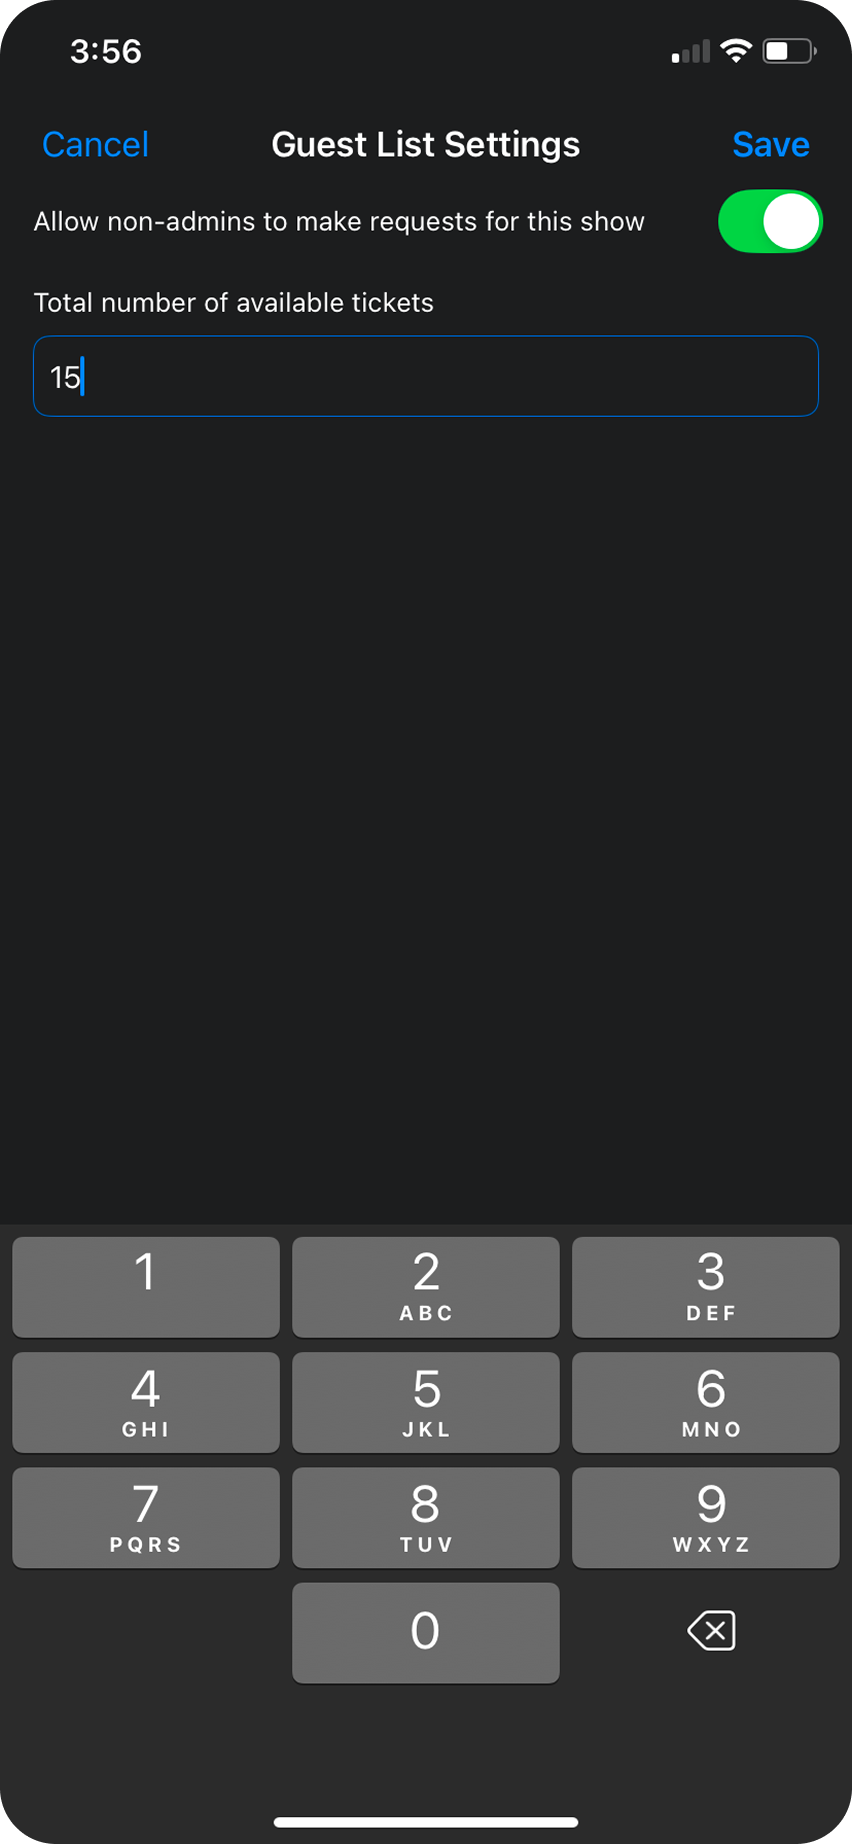
You can edit the total number of spots available on a guest list, but clicking on the three dots at the top right corner of the guest list and go into the
You can edit the total number of spots available on a guest list, but clicking on the three dots at the top right corner of the guest list and go into the
Guest List Settings.You can also toggle the ability for non-admins to make requests for this show, by toggling on the switch at the top of the screen.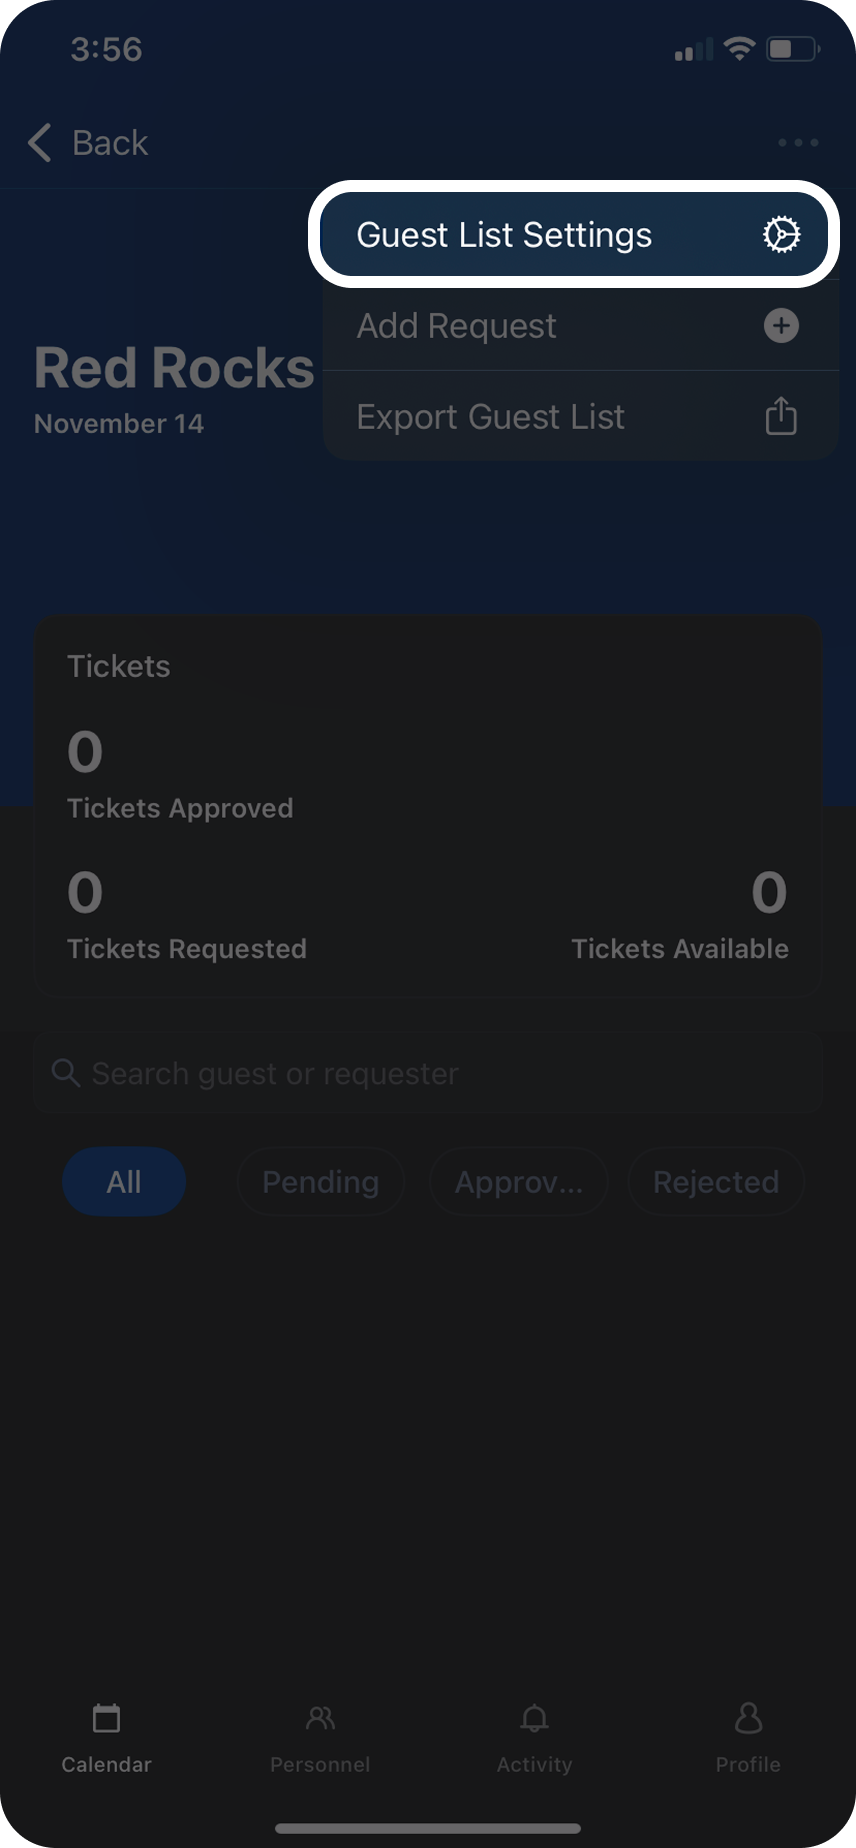
Export Guest List
Once you’re ready for doors, Daysheets allows you to export your guest list on the fly and share in various ways.
Click on the three dots at the top right corner and choose
Once you’re ready for doors, Daysheets allows you to export your guest list on the fly and share in various ways.
Click on the three dots at the top right corner and choose
Export List Settings. You can now choose which information to include on your export by using the toggles, and you can also choose whether to export as PDF or CSV.