Creating & Adjusting Schedules
There are two ways to add events to a schedule:- Add singular events to the schedule
- Bulk create and edit schedules in takeover view
Singular Events
Without losing view of your day, you can quickly add a singular event to the schedule:- Press the + button in the top right hand corner, and select Event, or press cmd + e . This will open the Add an Event drawer on the right hand side of the window.
- Add an event name such as “Lobby Call”, and then give it a start time, and an optional end time.
- If there is a specific detail that you want to include on this event, you can include a note on the event. You can use this section to highlight specific details such as “Don’t be late!”
- You can also use the association field to search for specific individuals, groups, or goup tags, to restrict who can see this event. To learn more about visibility settings, visit the Personnel page.
Save in the lower right. The event will be added to the schedule!

Multiple Events
To work on the entire day’s schedule at once, you can access the full schedule edit view by clicking Edit in the top right hand corner of the schedule.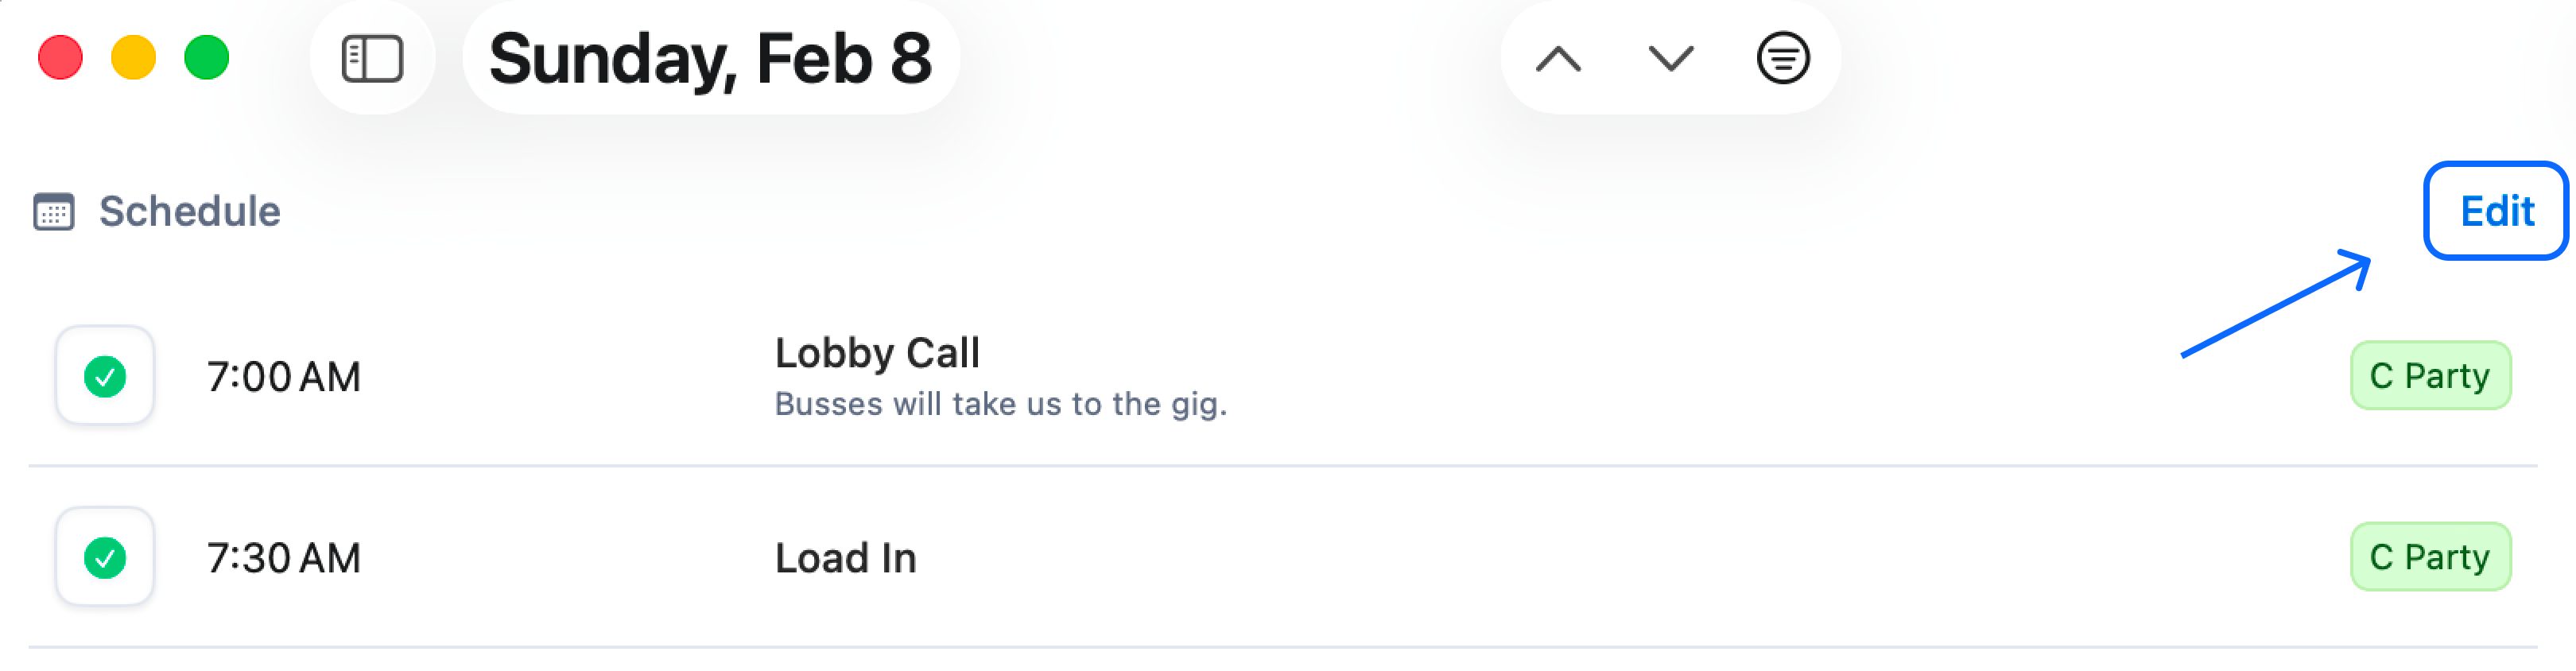
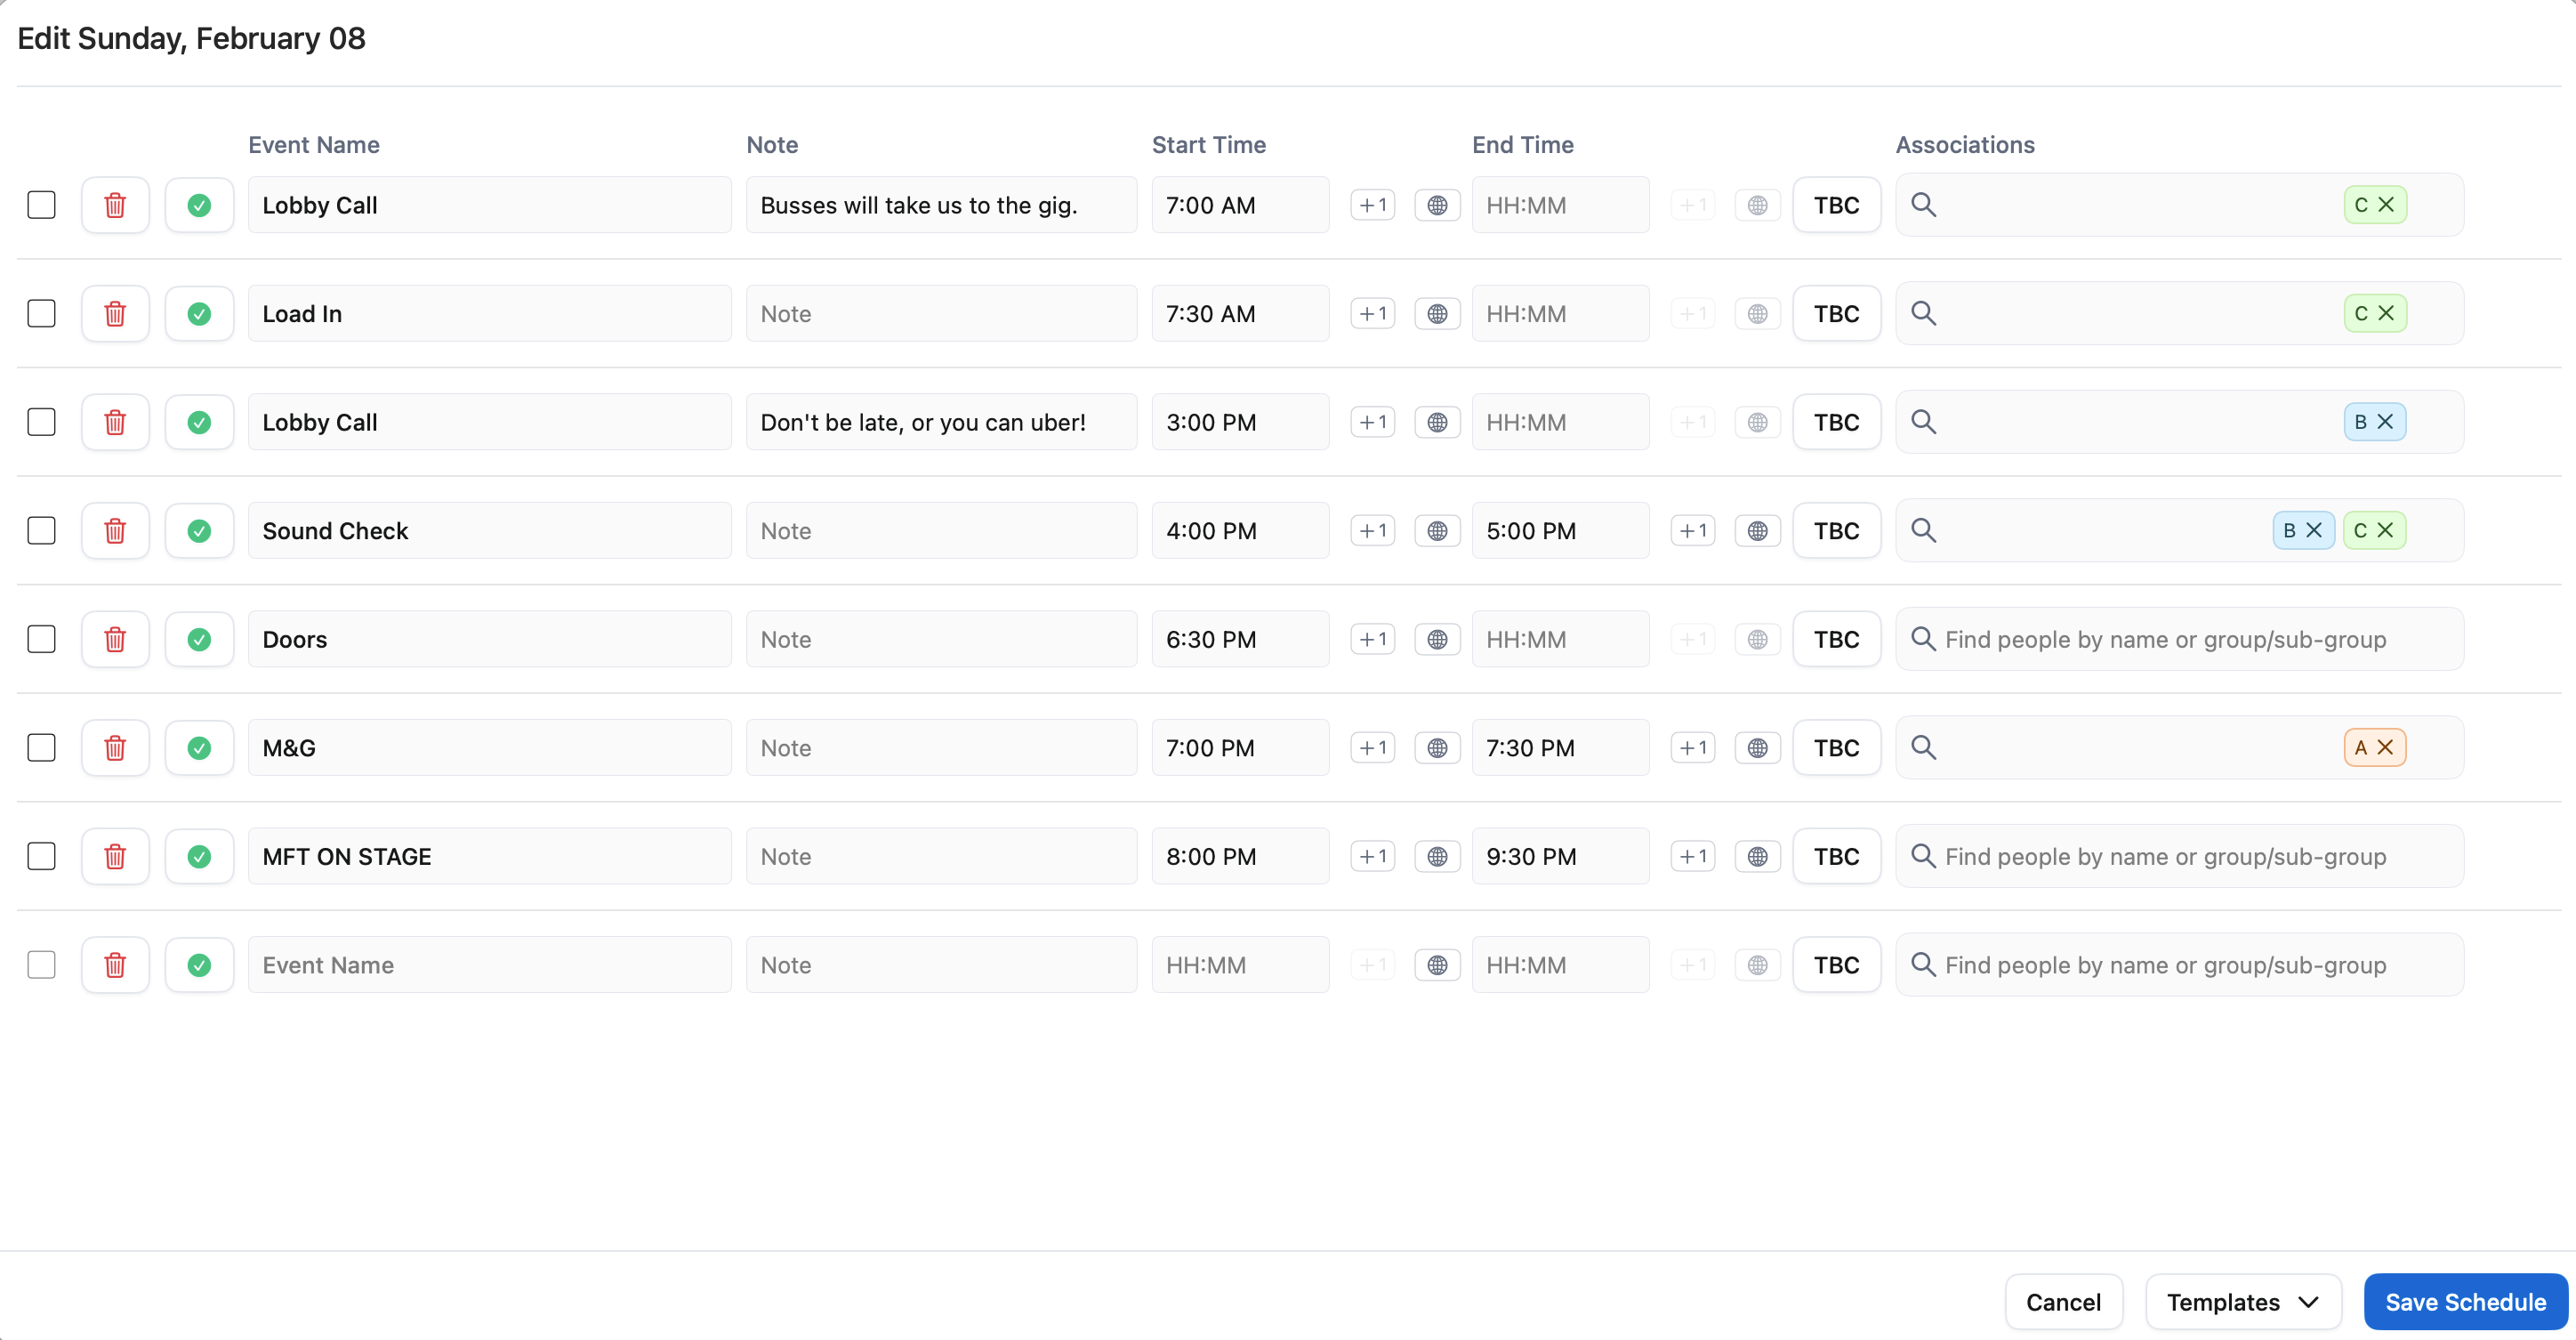
- Add an event name such as “Lobby Call”
- Add a note to the event, such as “Busses wil take us to the gig”
- Add a start time with keyboard shortcuts such as 7A or 0700 and press tab
- Add an optional end time if required
- Use the Associations search to tag a specific individual, group or group tag with that event
- Press tab to move onto creating the next event.
Shifting Schedules (Bumps)
Bumps allow you to shift the start and times of multiple events at once multiple schedule events at once. This is great when a load in schedule changes, or doors are delayed and your run of show needs to shfit by 15 minutes.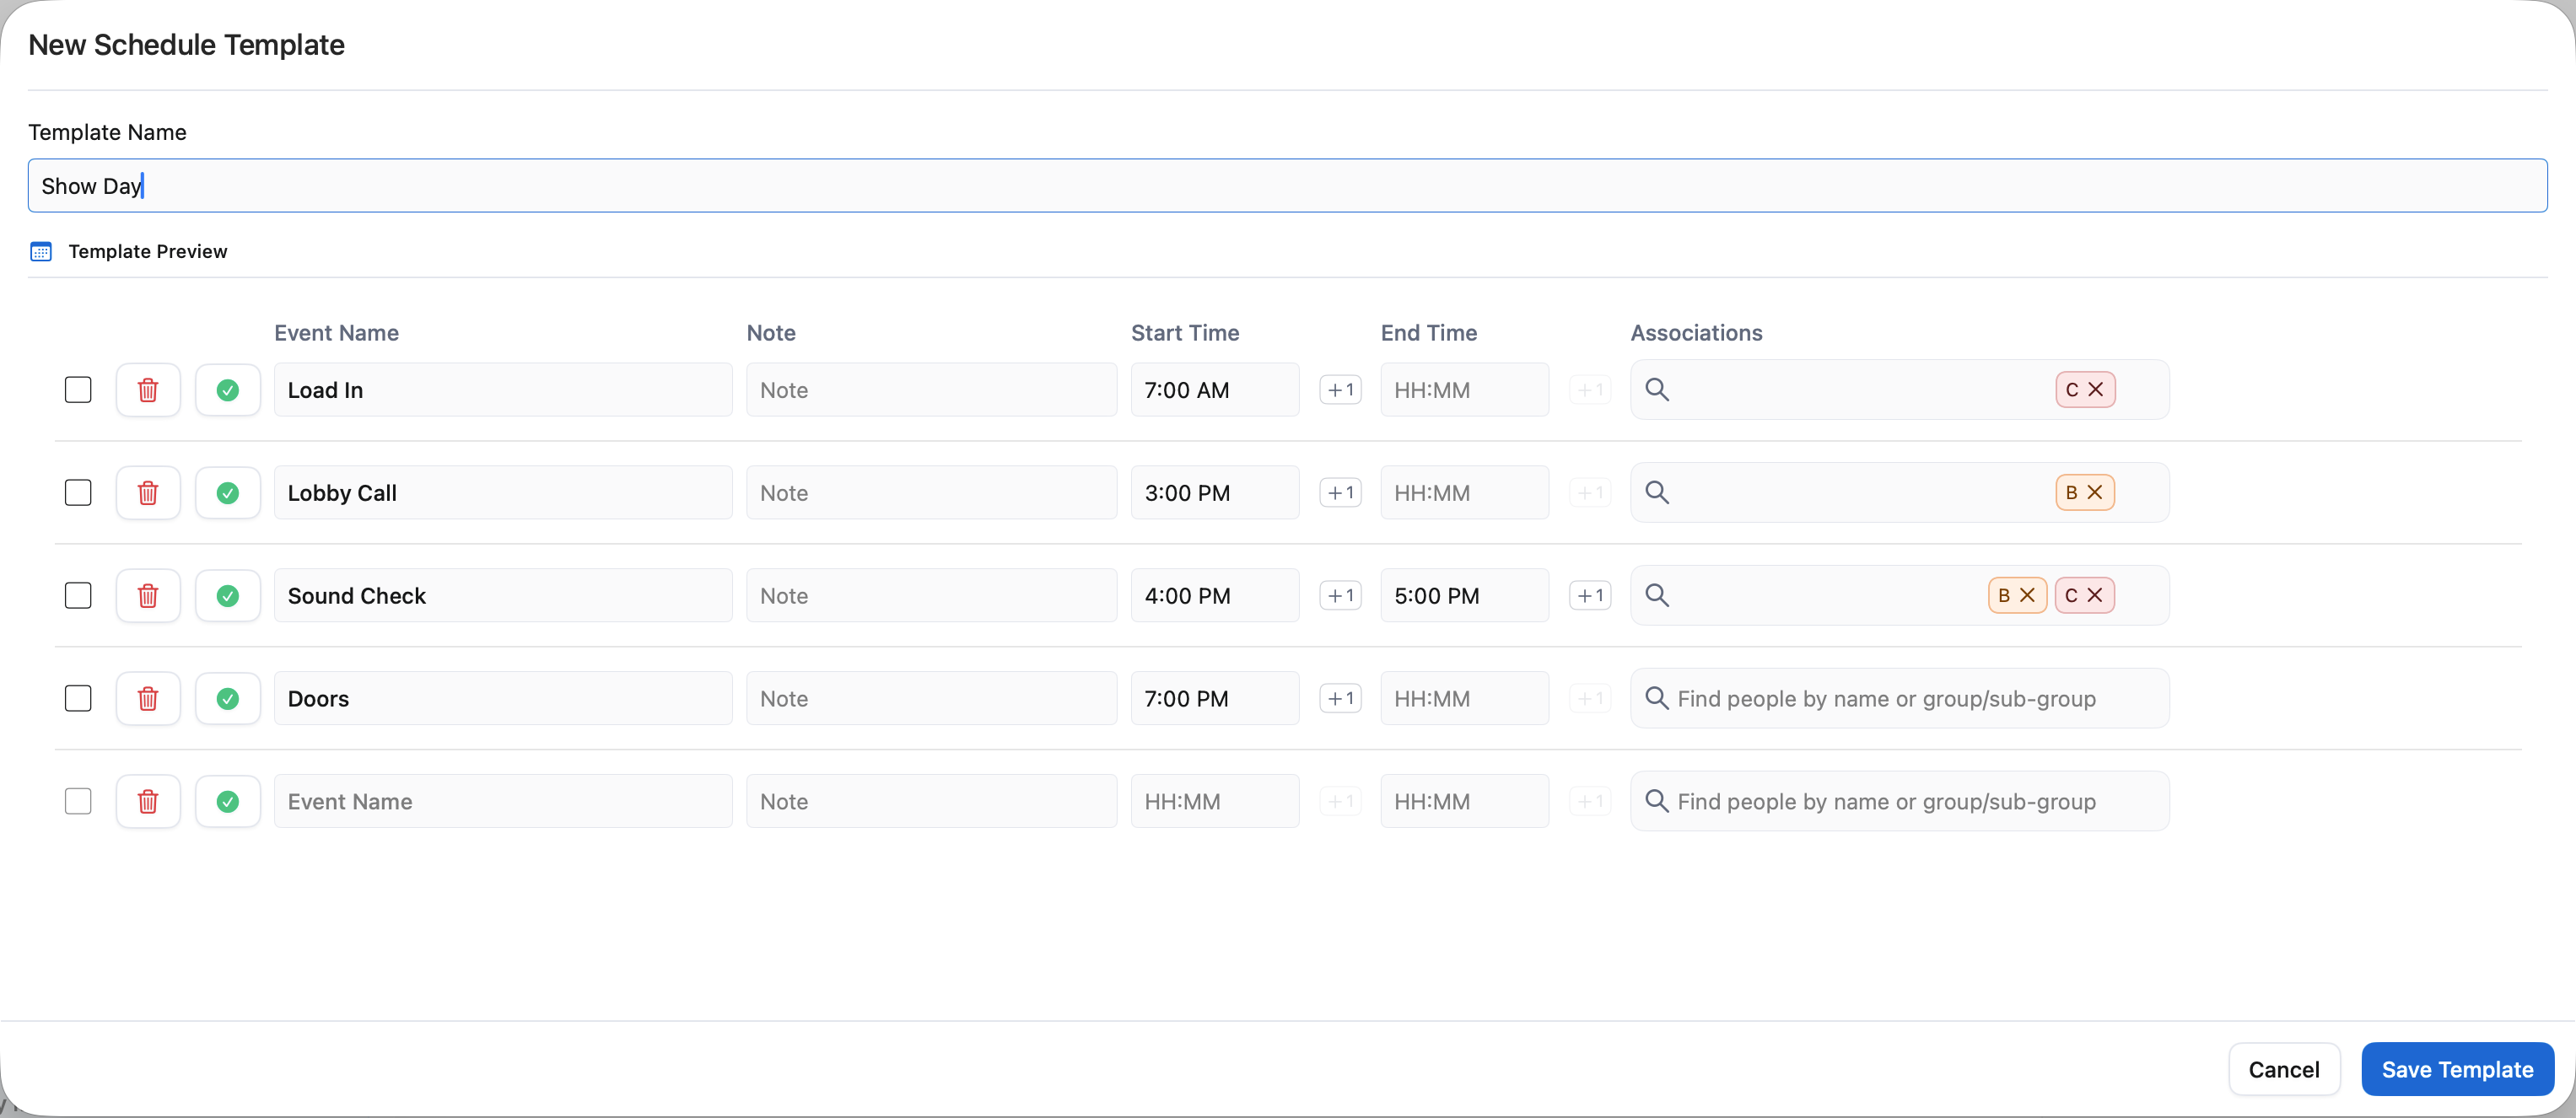
Schedules are designed to stay flexible while keeping everyone aligned. Once you combine templates with bumps, managing show days becomes significantly faster and more reliable.