Because charter flights are not connected to airline systems, all details must be entered and maintained manually.
When to Use a Charter Flight
Use a Charter flight when:- The flight does not have a commercial airline or flight number
- The aircraft is privately operated
- Timing may change or is not finalized
- Passenger lists are managed internally
- You need full control over routing and visibility
Creating a Charter Flight
You can create a charter flight from either the Flight Grid or any Day View on your tour. Both entry points create the same charter flight record.- Click the blue + button in the top right hand corner and select Flights, or press cmd + F
- Select Enter Manually when Daysheets asks for your entry method
- Select Charter from the flight type dropdown.
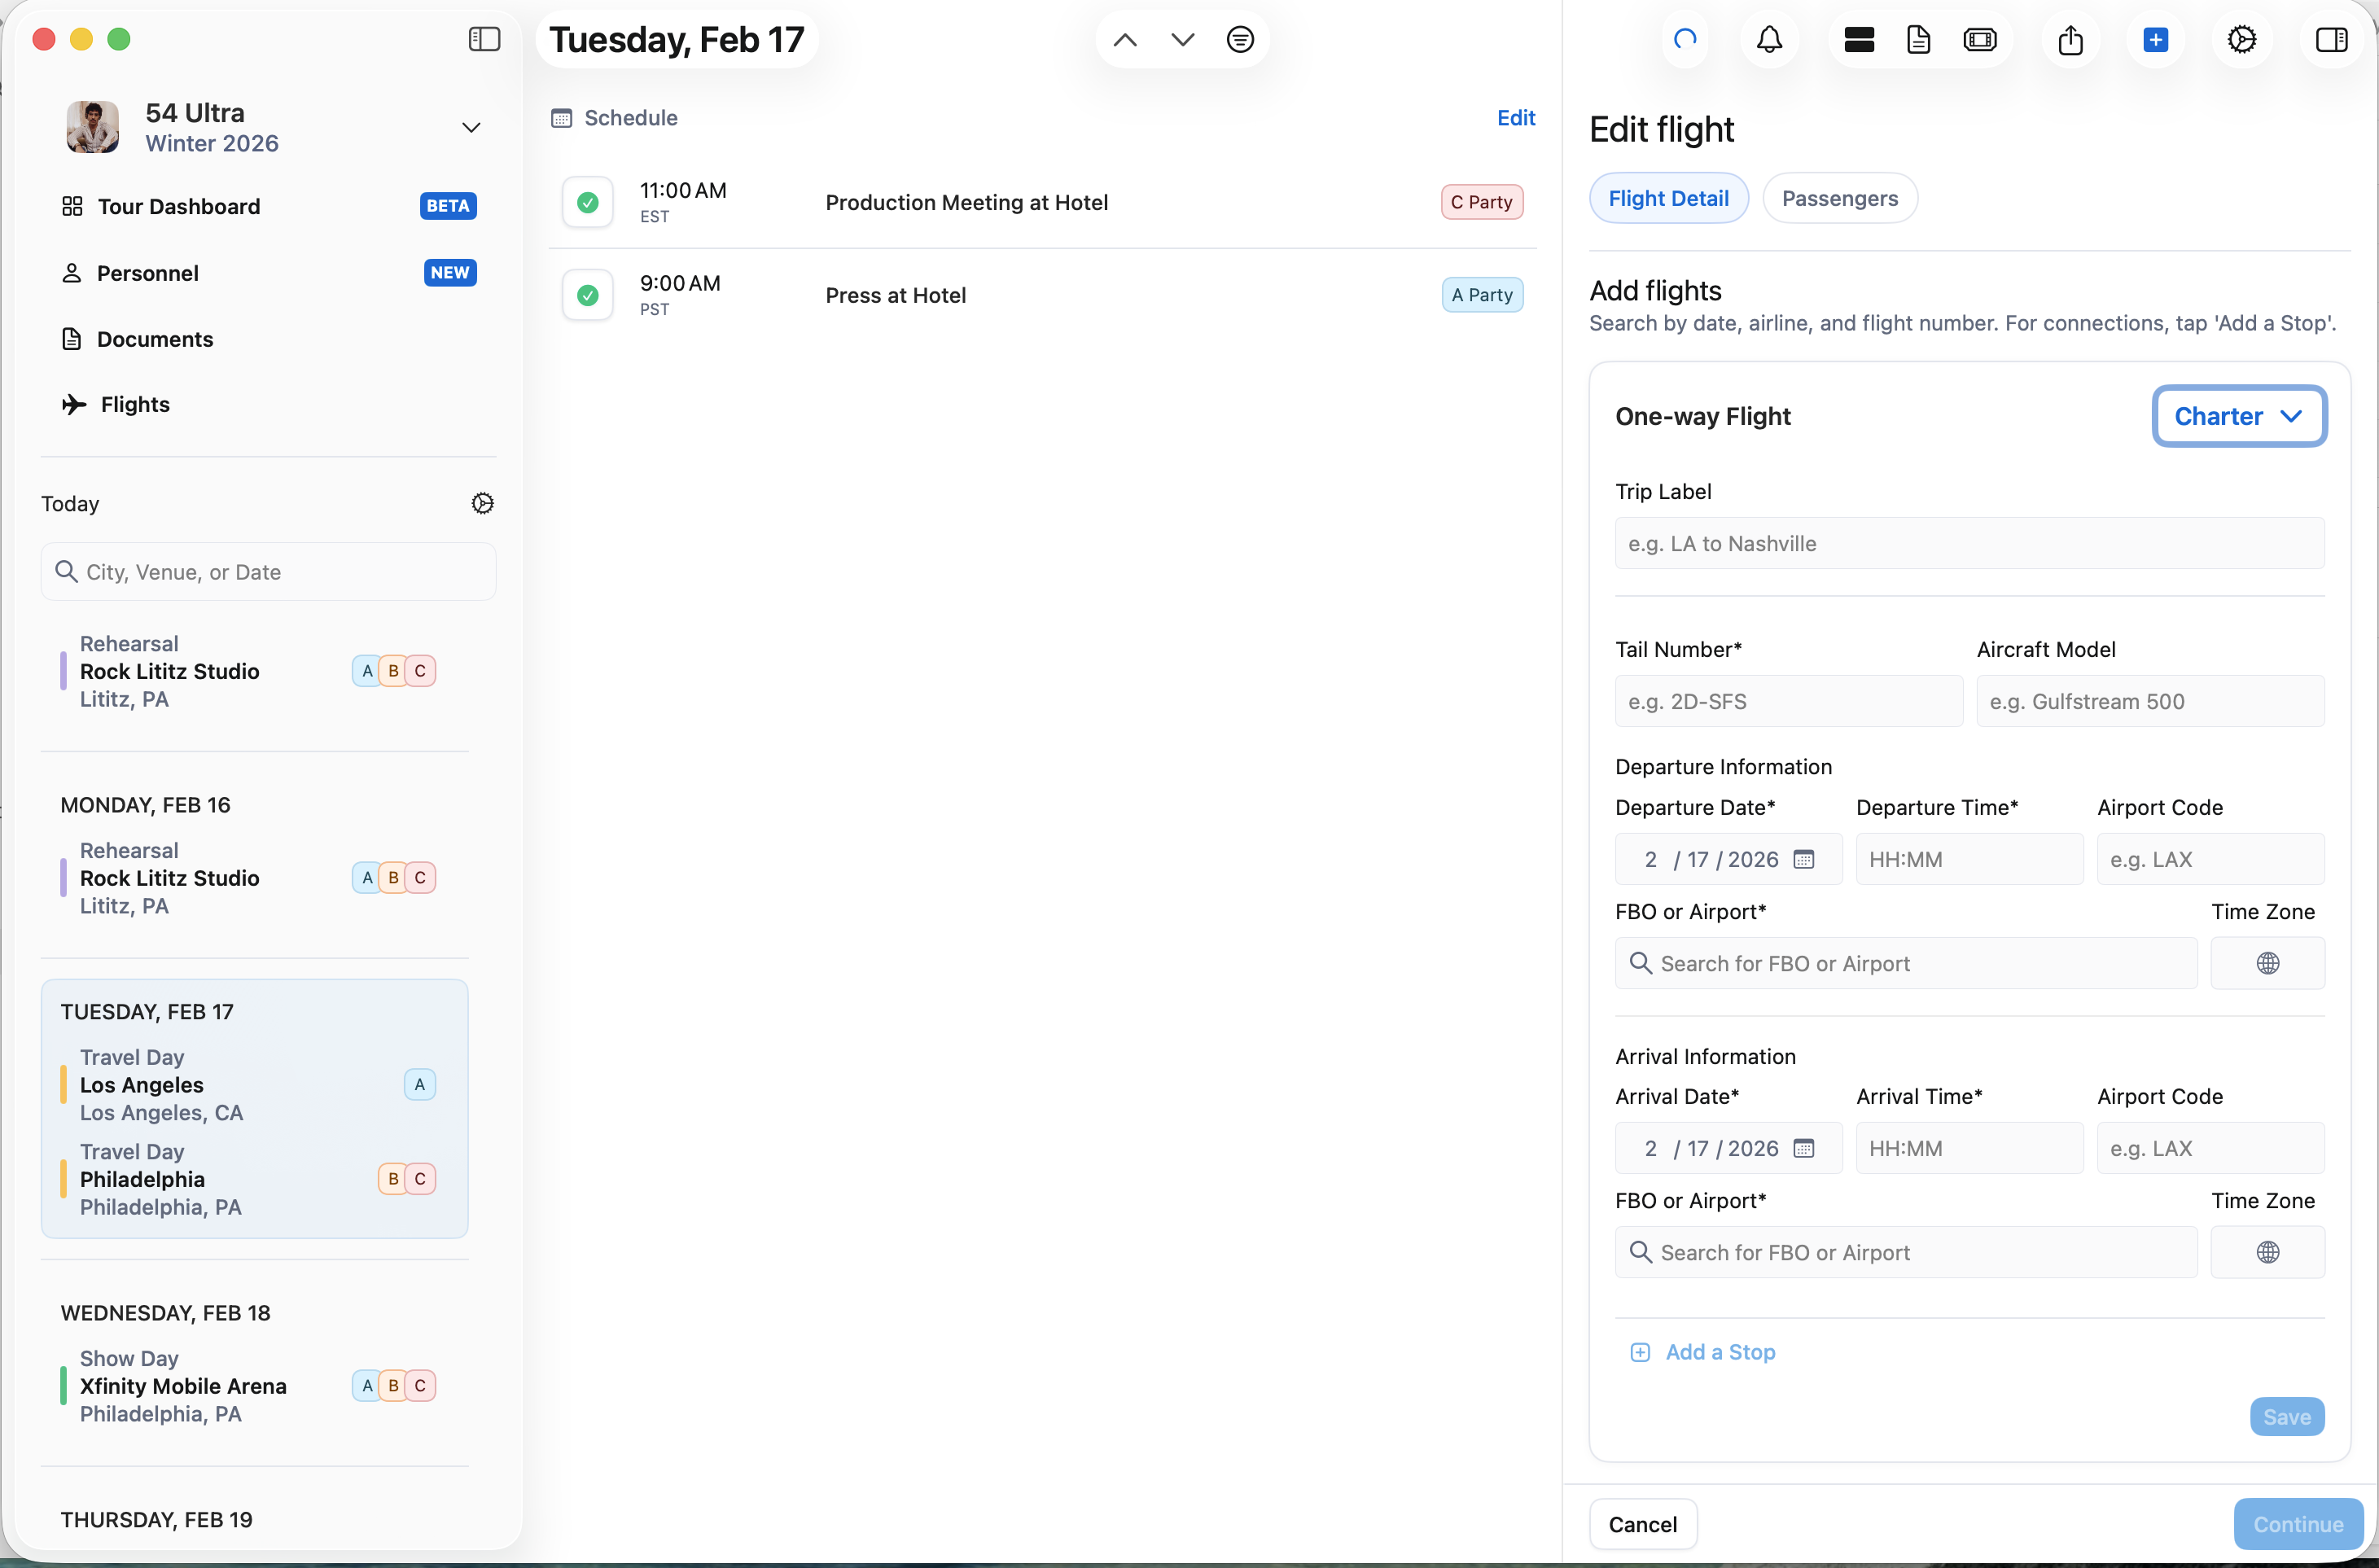
- Trip Label helps identify the charter at a glance. While these are optional, we suggest naming your trip. For Example: Charter to LA. This trip label will apear on the schedule for you and your team, and will also appear in the flight grid. If left blank, the flight will display PHL -> LAX, or whatever the Airport codes are of the trip.
- Tail Number is required to be added for all charters. If unassigned, you can enter XXXXX
- Aircraft Type is optional, but a nice touch for your team!
- Departure & Arrival Date and Times
- Set Departure Airport or FBO by using the Google Maps search field (required)
- Add the Departure Airport Code (optional)
- Set Arrival Airport or FBO by using the Google Maps search field (required)
- Add the Arrival Airport Code (optional)
If your trip includes multiple legs, you can click Add a Stop at the bottom of the entry fields, to add an additional charter to the trip.
Adding Passengers
Switch to the Passengers tab to assign people to the charter. You can:- Add individuals
- Add groups or sub-groups
- Assign multiple passengers at once
- Add Guests using the same search behavior
Saving the Charter
Once all required fields are completed, click Save. The charter flight will immediately appear across:- Flight Grid
- Day Views
- Desktop schedules
- Mobile schedules