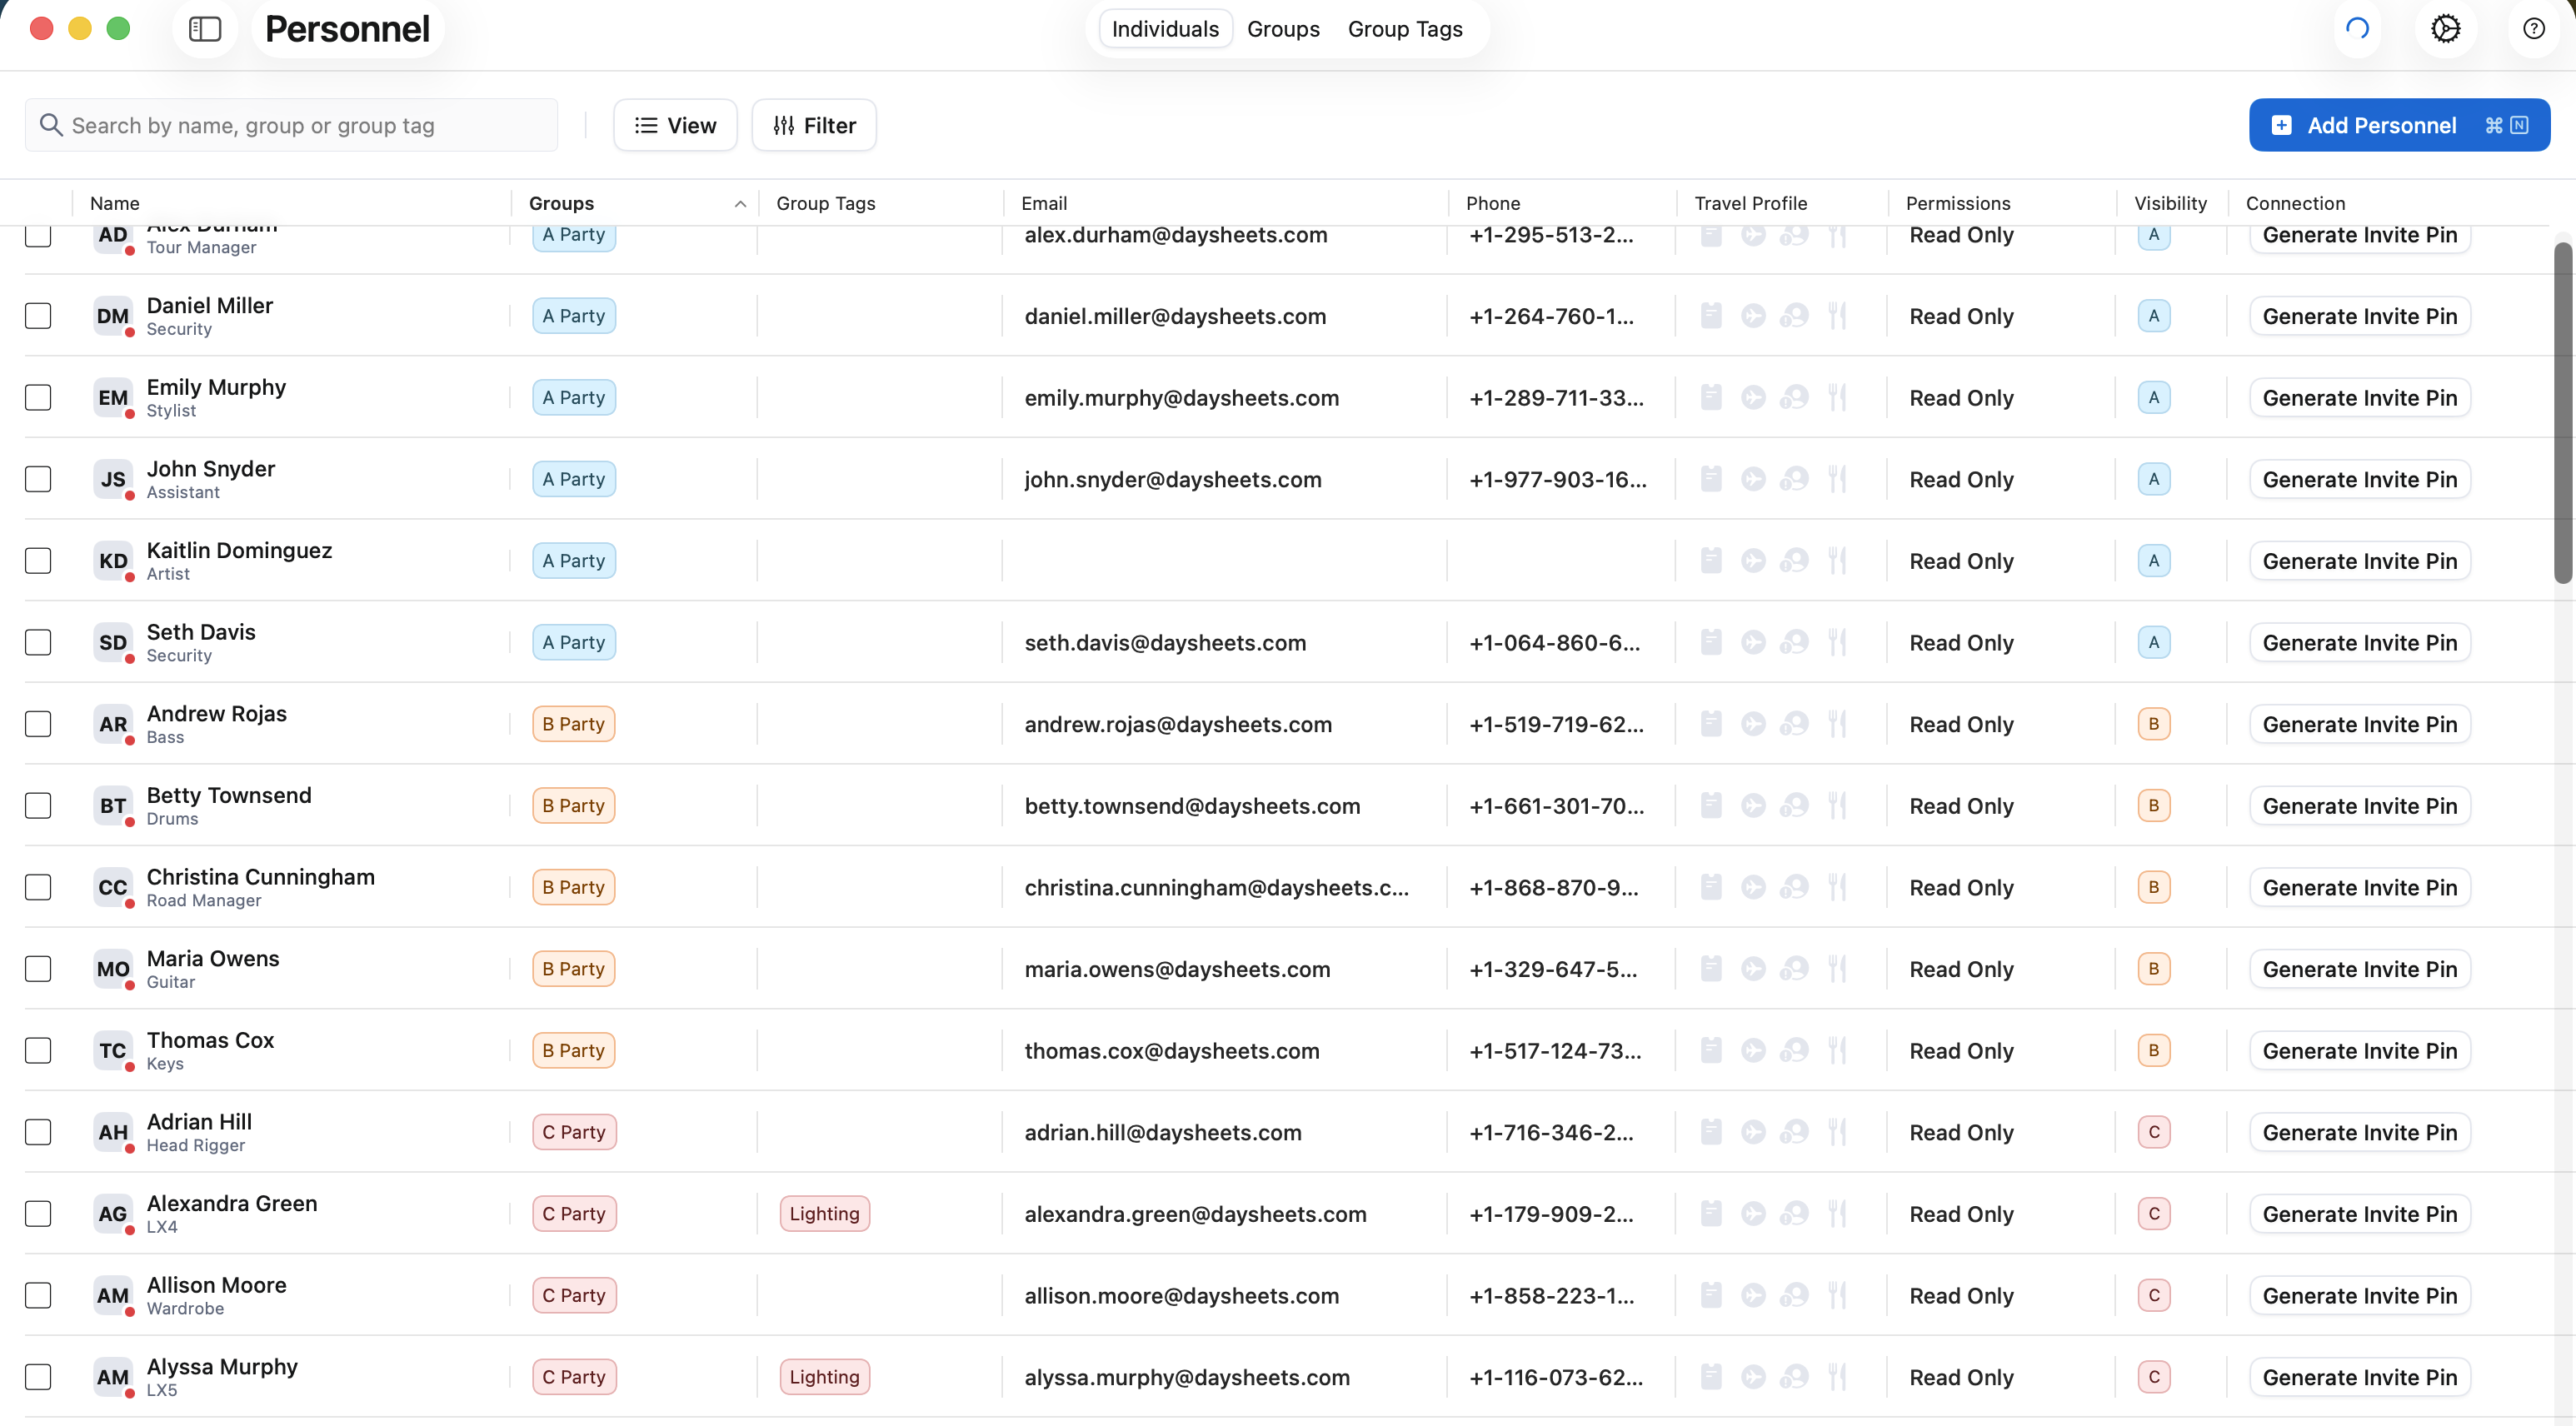
Adding Team Members
Click the blue Add Personnel button in the top right to add team members to your tour. Once the menu on the right hand side hand side opens, you have various ways to add personnel:- Creating or Searching for Individuals
- Importing from a CSV
- Importing from a Previous Tour
Create or Search for Members
In the search bar, type an indivual’s name to see if they already exist, or enter their name in the search field to create a new member. Previous members will only show up if you or your tour has worked with them in the past.Search or Add
In the search bar, type an indivual’s name to see if they already exist, or enter their name in the search field to create a new member. Previous members will only show up if you or your tour has worked with them in the past.
Enter or Confirm Basic Details
If you selected a previously created member, or clicked Add Person, you will be instructed to confirm or enter their basic details which include their Full Name, Role on the tour, Phone Number, and Email address.
The only two fields required are name and role. You can add team members without their email addresses or phone numbers, and still invite them to Daysheets.
Toggle on or off Travel Profiles
If you want to request travel details from this person, such as frequent flyer numbers, dietary restrctions and passport information, toggle on the Travel Profile switch. When toggled on, team members will be prompted to add their travel profile information when they join. To learn more about Travel Profiles, click here.
Adjust Groups and Group Tags
If you are using Groups and Group Tags, you can use the drop down to select which group this person belongs to, and and any associated group tags affiliated with this person.When apply a group to an individual, the default permissions and visibilty settings for that group will be applied to this person. If you modify either of these settings, that will override the default group permissions and visibility for this person only.To learn more about groups and group tags, click here.
Select Permissions
Permissions define how your team can interact with Daysheets. You can select from:Read Only restricts their functionality to read information, and not make changes.Edit Permissions allows the person to edit everything, and see everything.Custom Permissions gives you contorl to allow members to edit certain details.To learn more about permissions, visit the Visibility & Permissions guide.
Select Visibility
Visibility let you determine what this person is going to see on your tour, specifically if you are using groups and group tags. The default visibility options are:All Events and Reservations allow the team member to see everything that is being added to Daysheets.Events & Travel That Pertain to Their Group is the default when using Groups. This setting restricts this person to only see events and reservations associated with their group.Custom Visibility allows you to give specific individuals additional visibility permissions. A great example of when to use custom visiblity is when you have A,B & C Parties on your tour, and a read only user in your A party needs insigt into what the C Party is doing.To learn more about visibility, visit the Visibility & Permissions guide
Import Personnel From CSV
If you have your personnel grid in excel or google sheet,s you can export your personnel grid as a CSV. Once you have the CSV, from the Add Personnel Menu, select Import Personnel from CSV. You can then drag or upload the CSV file into Daysheets. Next you can map the correct values from your CSV file to the corresponding properties that Daysheets accepts. Daysheets only accepts full names, so if you have first and last split up into two columns, Select Full Name for both, and Daysheets will instruct you on how to choose which is the first name, and which is the last.If you already have groups setup, you can add a column to your CSV with the corresponding letter of that group, so it automatically maps each person to their respective group. If you haven’t setup groups yet, we reccomend doing that first.

to see how each individual will be imported into Daysheets. you can use the toggles on the left hand side to determine who you want to import, and who you want to leave off.
Once you’re ready, click Import, to add these individuals to the tour.
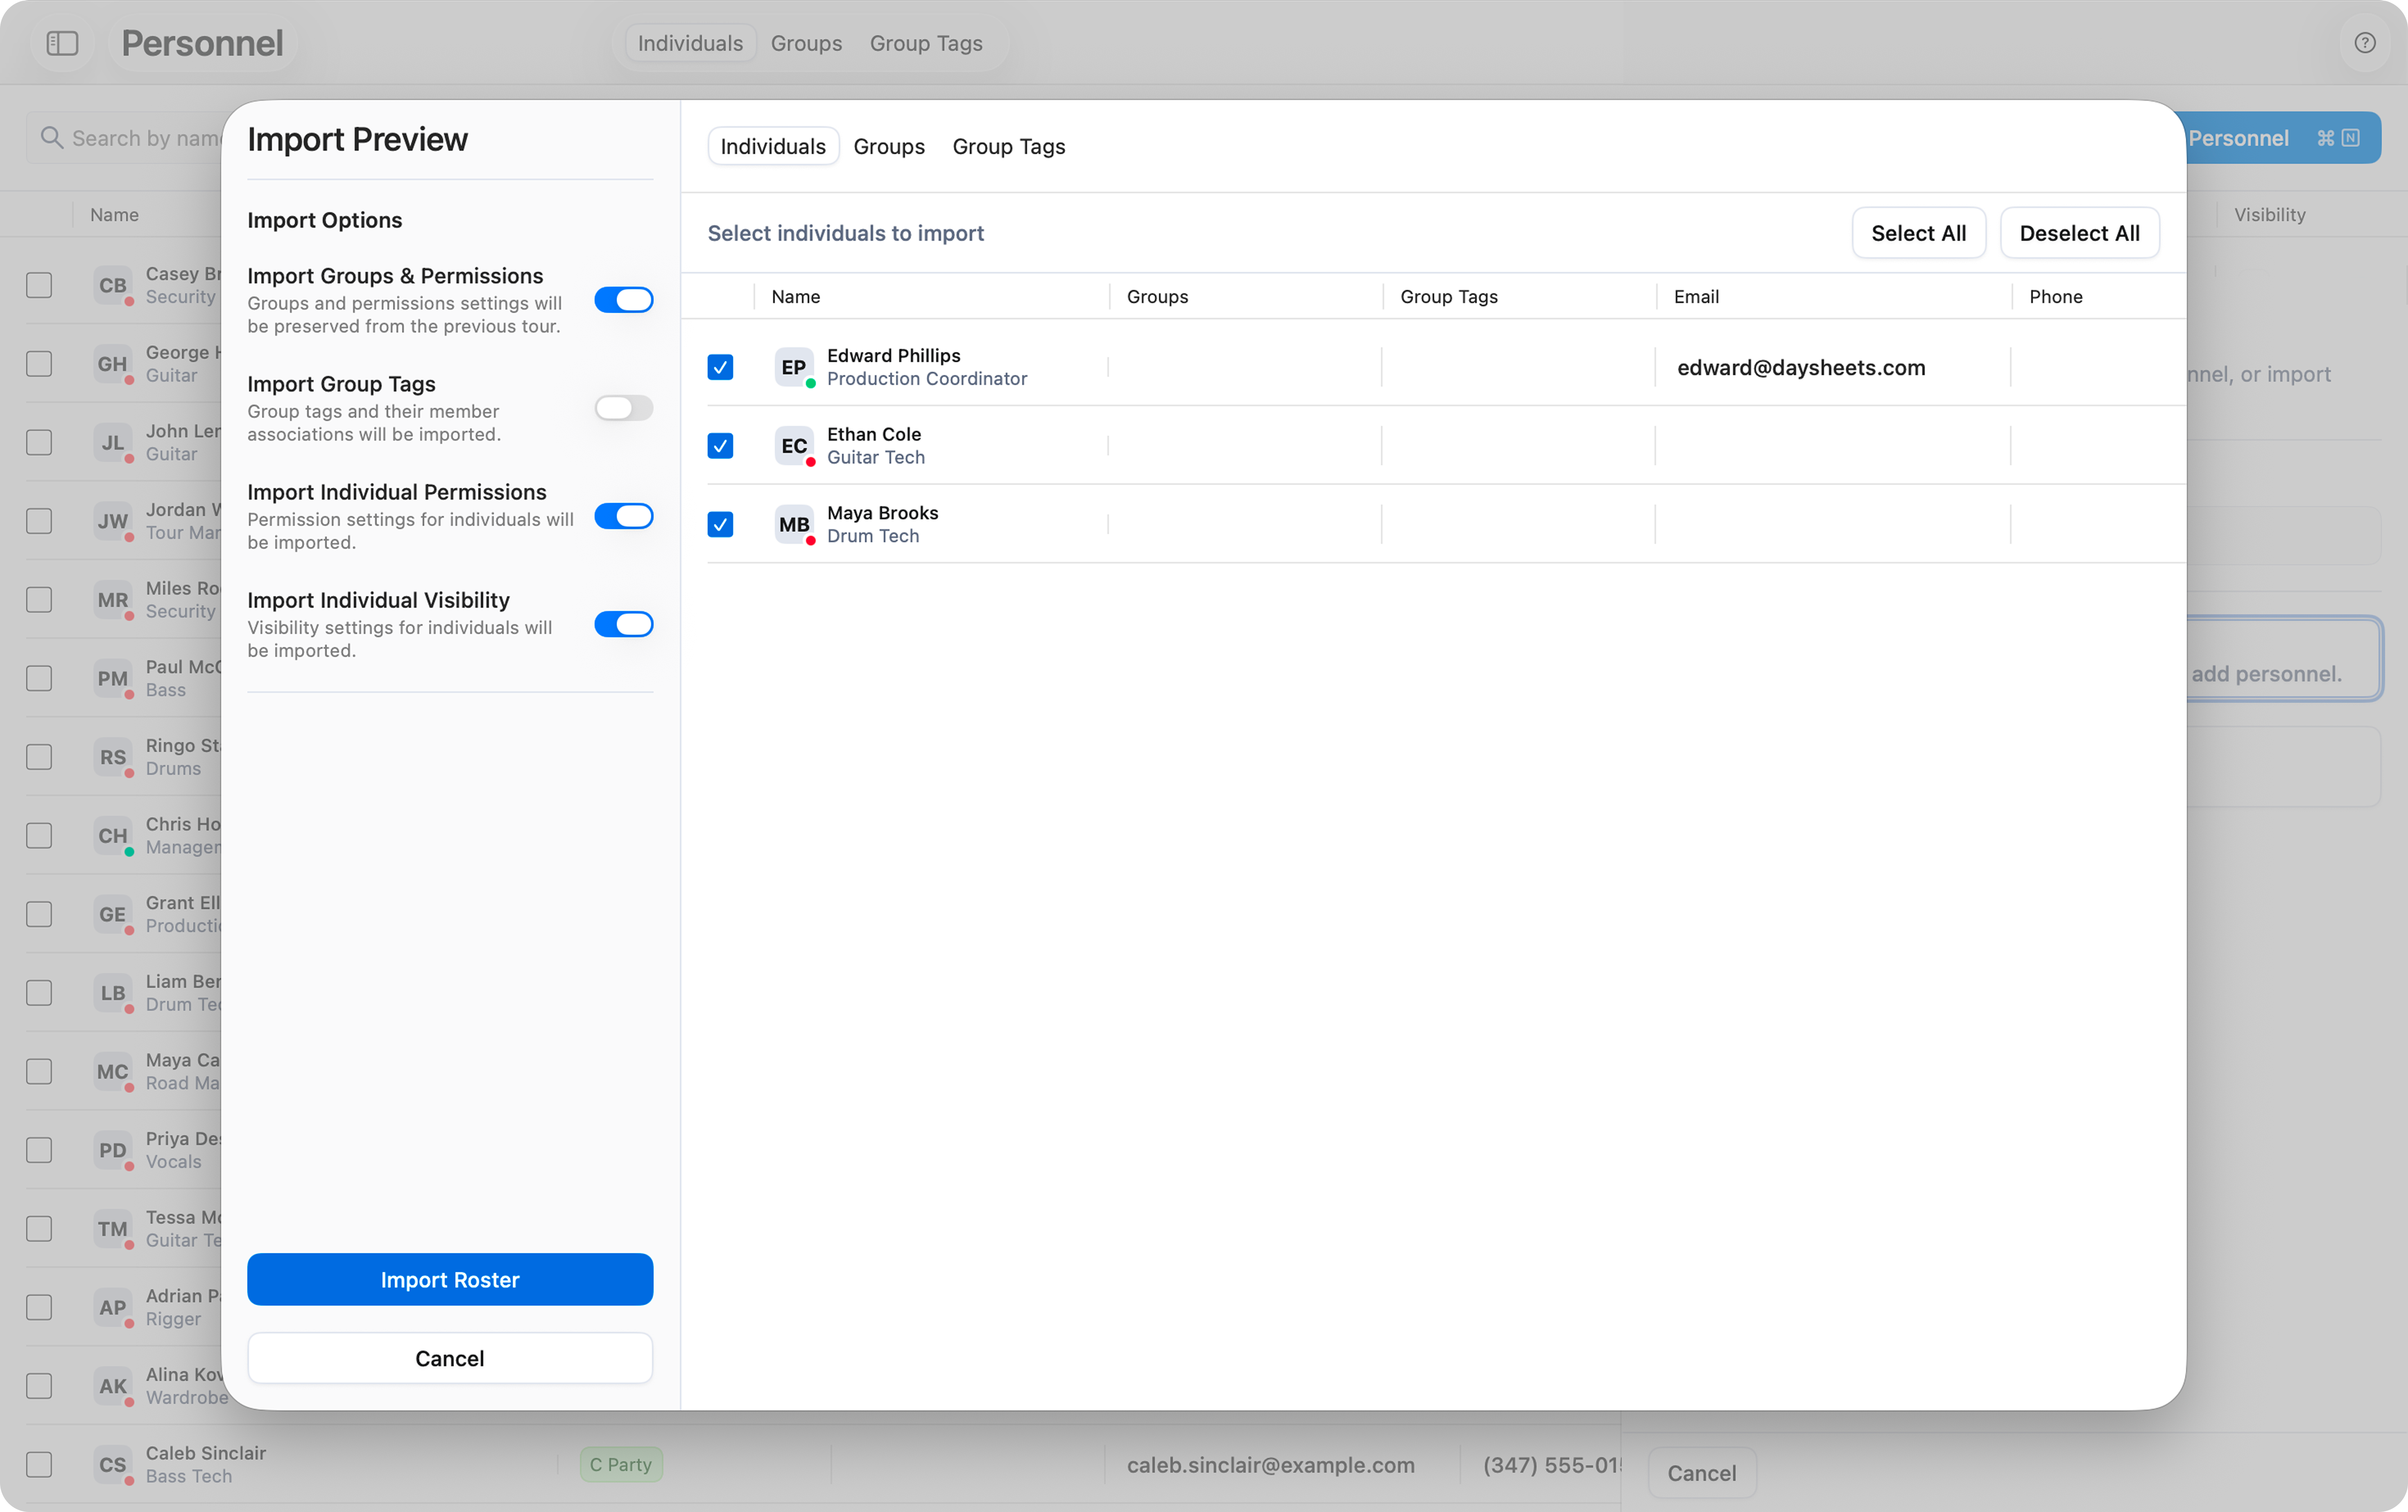
Import From a Previous Tour
If you have used Daysheets in the past, you can import personnel and groups that were used on a previous tour. After clicking Add Personnel, choose the Import Personnel from Previous Tour option. You can then scrool or search for a tour from the past. You can then select specific individuals or the personnel list to add to the new tour. You also have the option to import all previosuly Groups, Group Tags, Permissions, and Visibility settings that were used on your previous tour. Use the toggles on the left to choose which details you wish to import.