Adding a Transfer
To view the transfer grid and to add new transfers, click the blue + button in the top menu bar, or use the cmd + t keyboard shortcut. To add a new transfer, use the workflow at the bottom of the grid to create a transfer. First add a a label for the transfer which is how the transfer will appear in the schedule, Next search for a departure location and and add a pickup time. Next add an arrival location and Daysheets will automatically calculate the arrival time based on google Maps. Finally add passengers, the primary passenger for contact information when exporting grids, and the vehicle time. Click Save to add your transfer to your schedule.To quickly add arrival and departure locations, simply type h or v to automatically suggest any hotels or venues associated with the day you are working on.
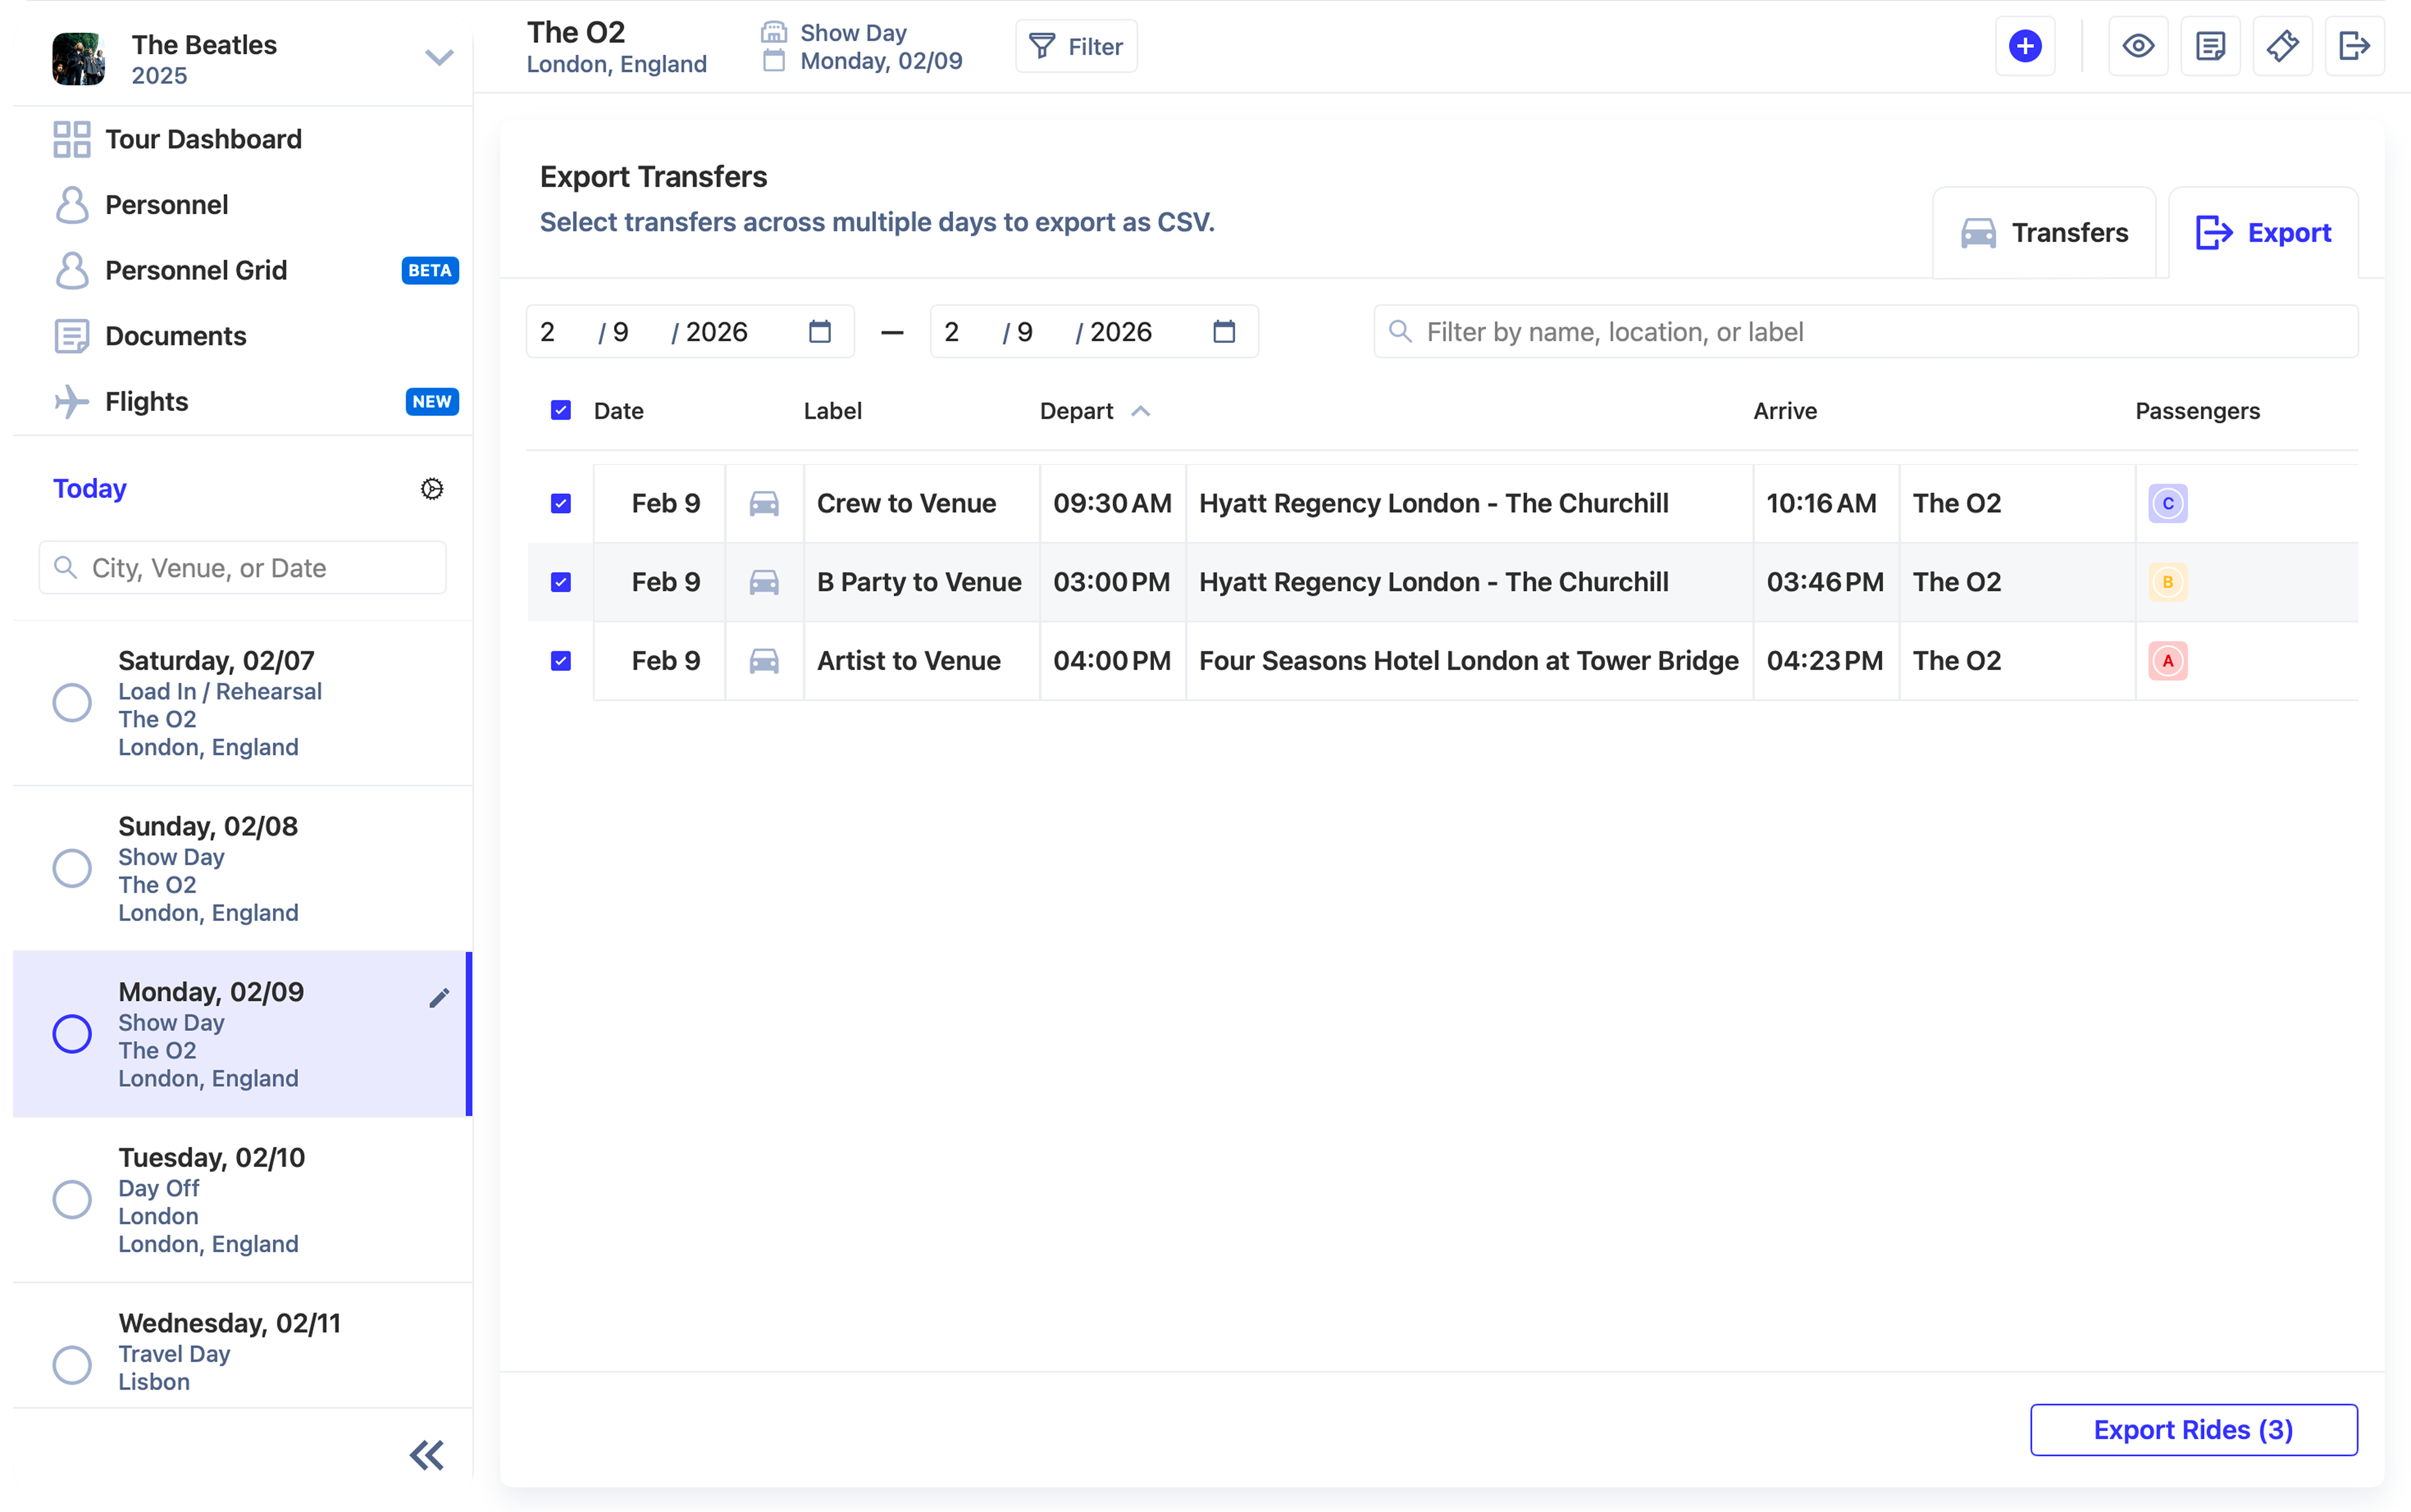
Exporting Transfers
Daysheets allows you to export transfer grids as a spreadsheet. Within the transfer grid, click the Export tab in the top right corner. Adjust the date range to add transfers for as many days as you need on the grid, and select which rides you want to include by using the blue check boxes to the left of the transfer. Once you have the selected transfers selected, click Export in the bottom right to save the transfer grid as a CSV.